Glide Rig - User Manual
This step-by-step guide shows how to assemble and fine-tune your Unifiber Glide Rig.
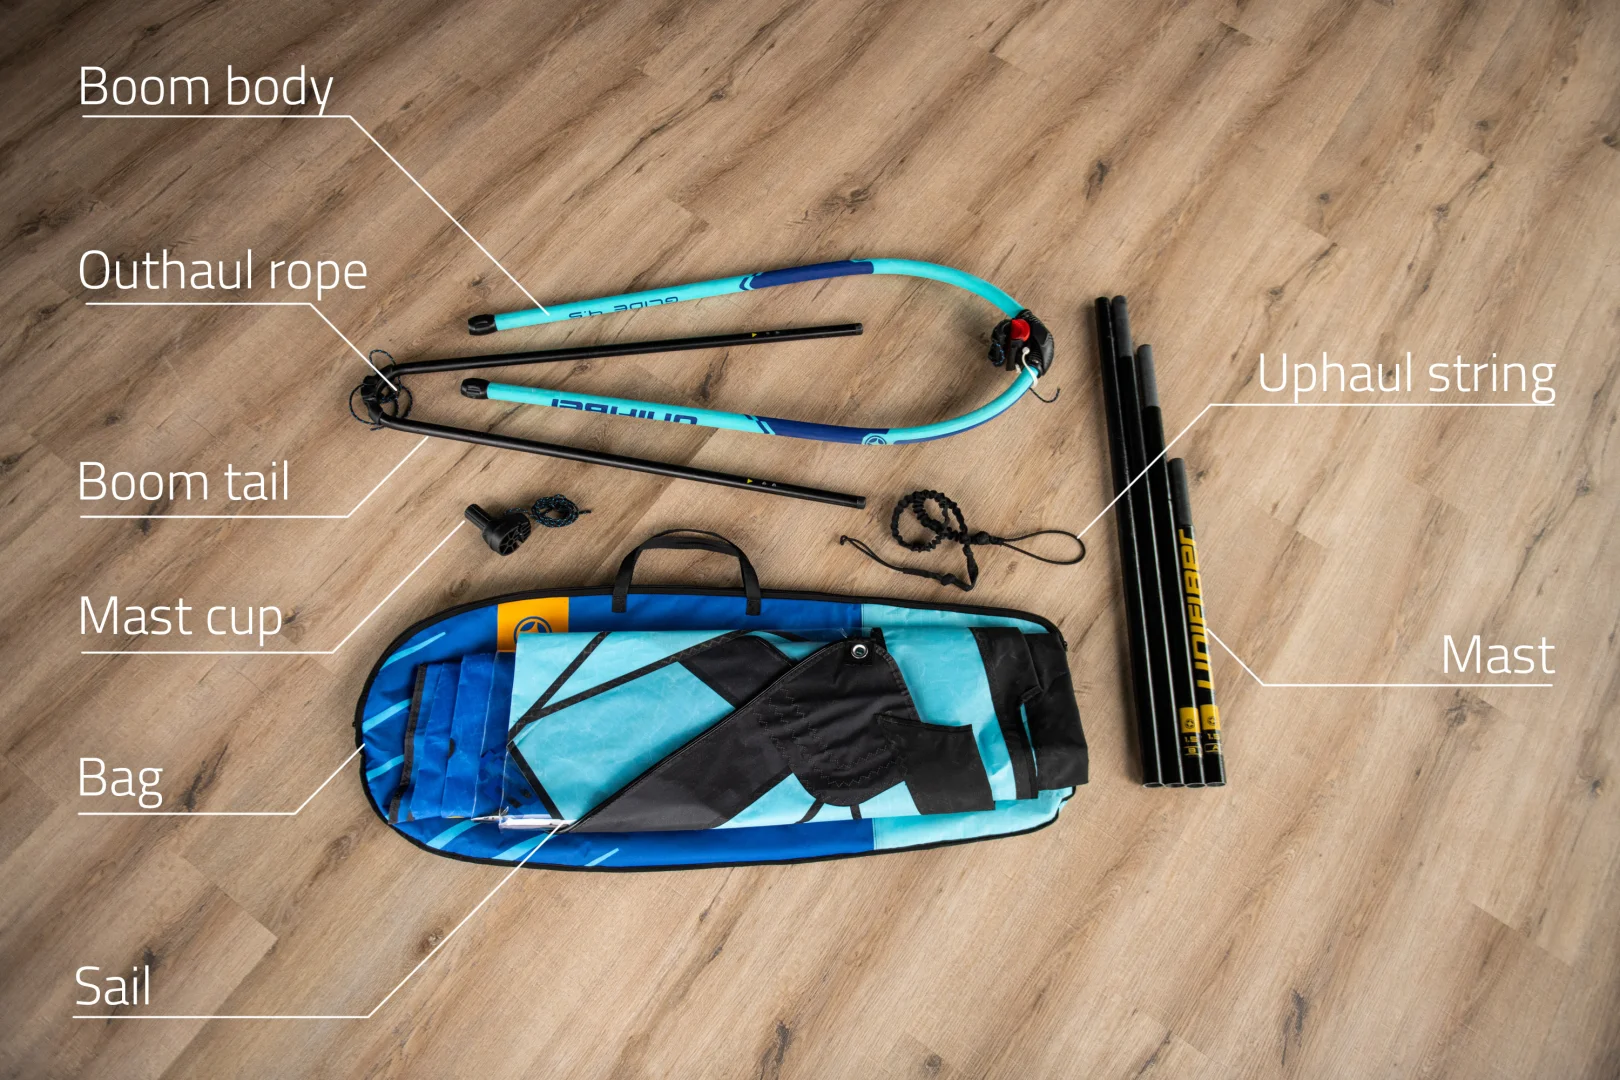
Contents:
- Sail
- Mast - four parts: A, B, C and D (note that 1.5m size has three mast parts)
- Boom - two parts: body and tail (note that 5.5m size has four parts: body, tail, and two body extension tubes)
- Mast cup with downhaul rope
- Uphaul line
- Batten tensioner key
Rigging:
1. Unpack all rig components and lay them out.
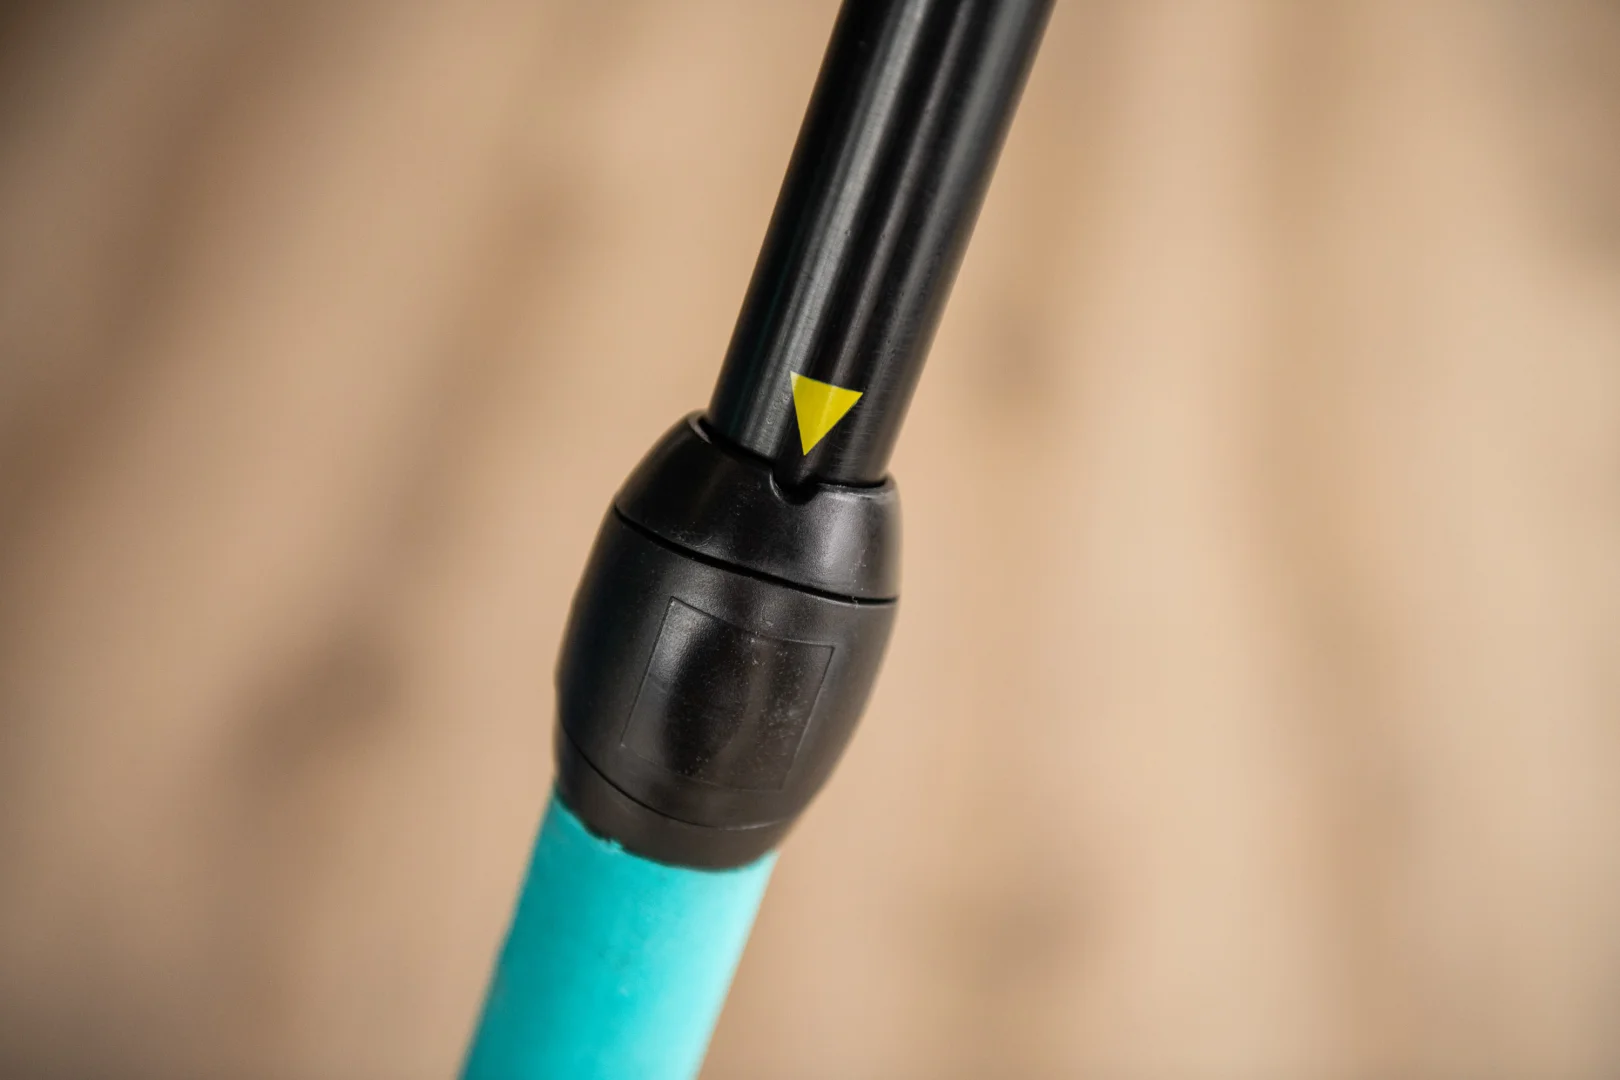
2. Assemble the boom. Set the length as specified by the yellow marker.
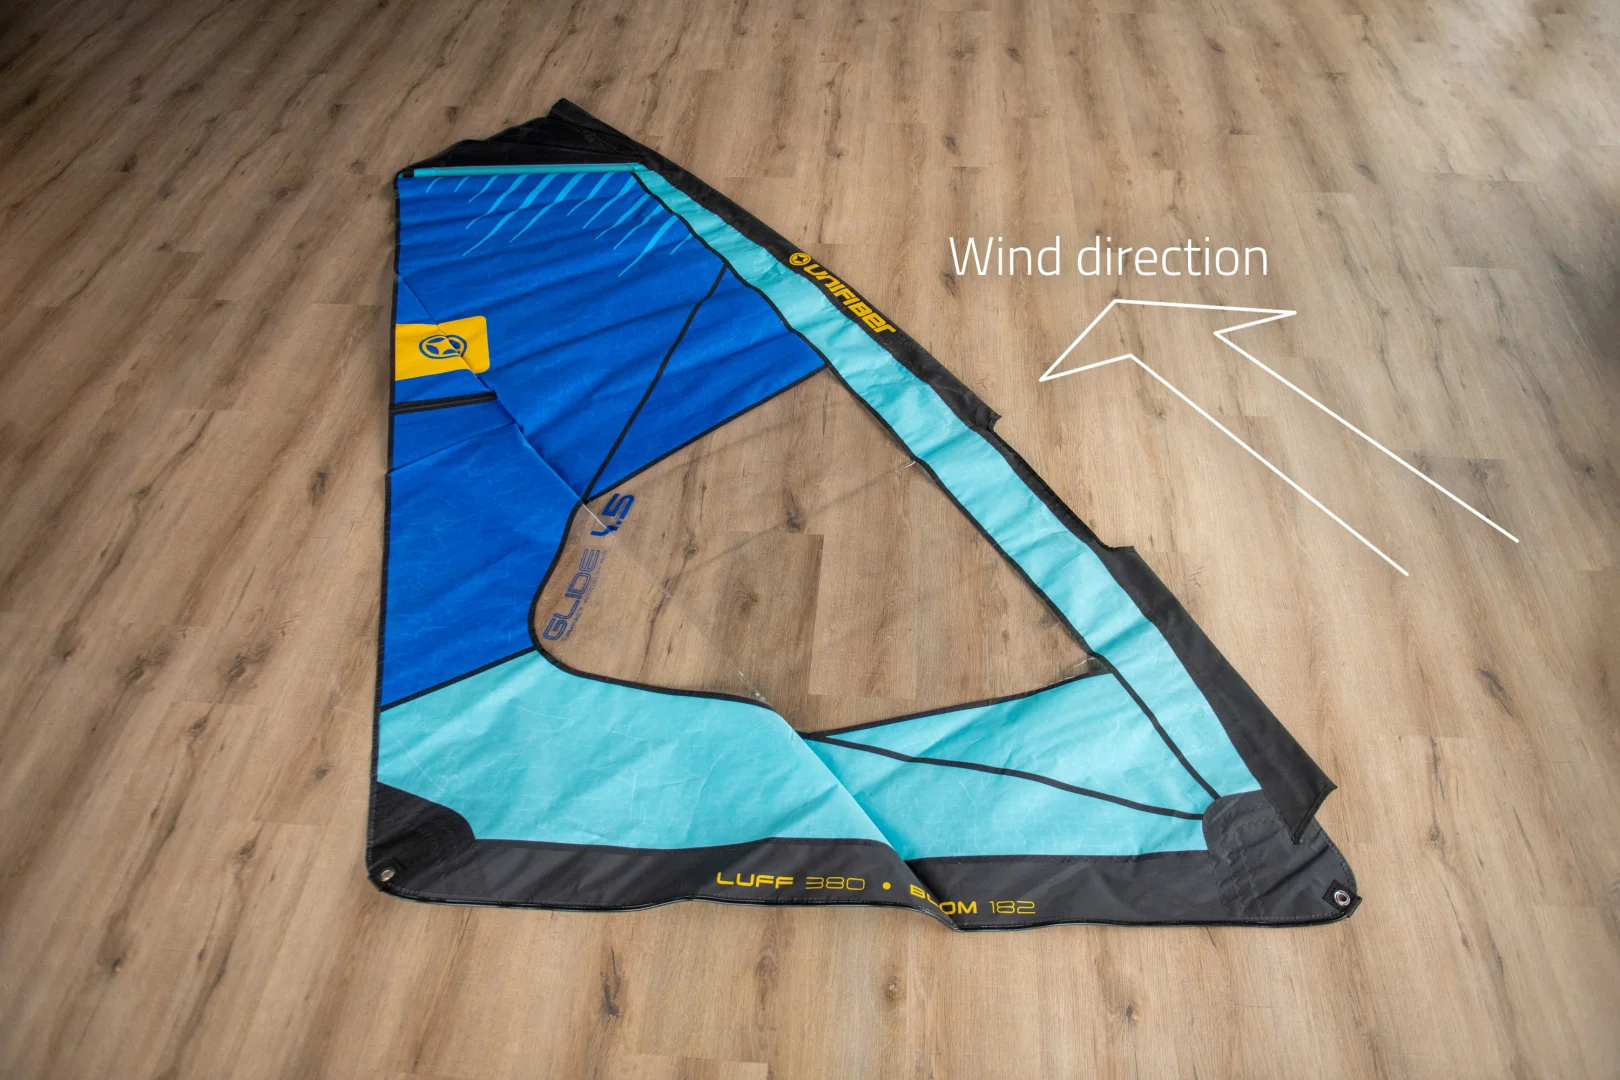
3. Unroll the sail downwind on a flat and gentle surface, like grass or sand.

4. Assemble the mast parts, in order A-B-C… where A is the bottom part. Slide the mast up the luff sleeve.
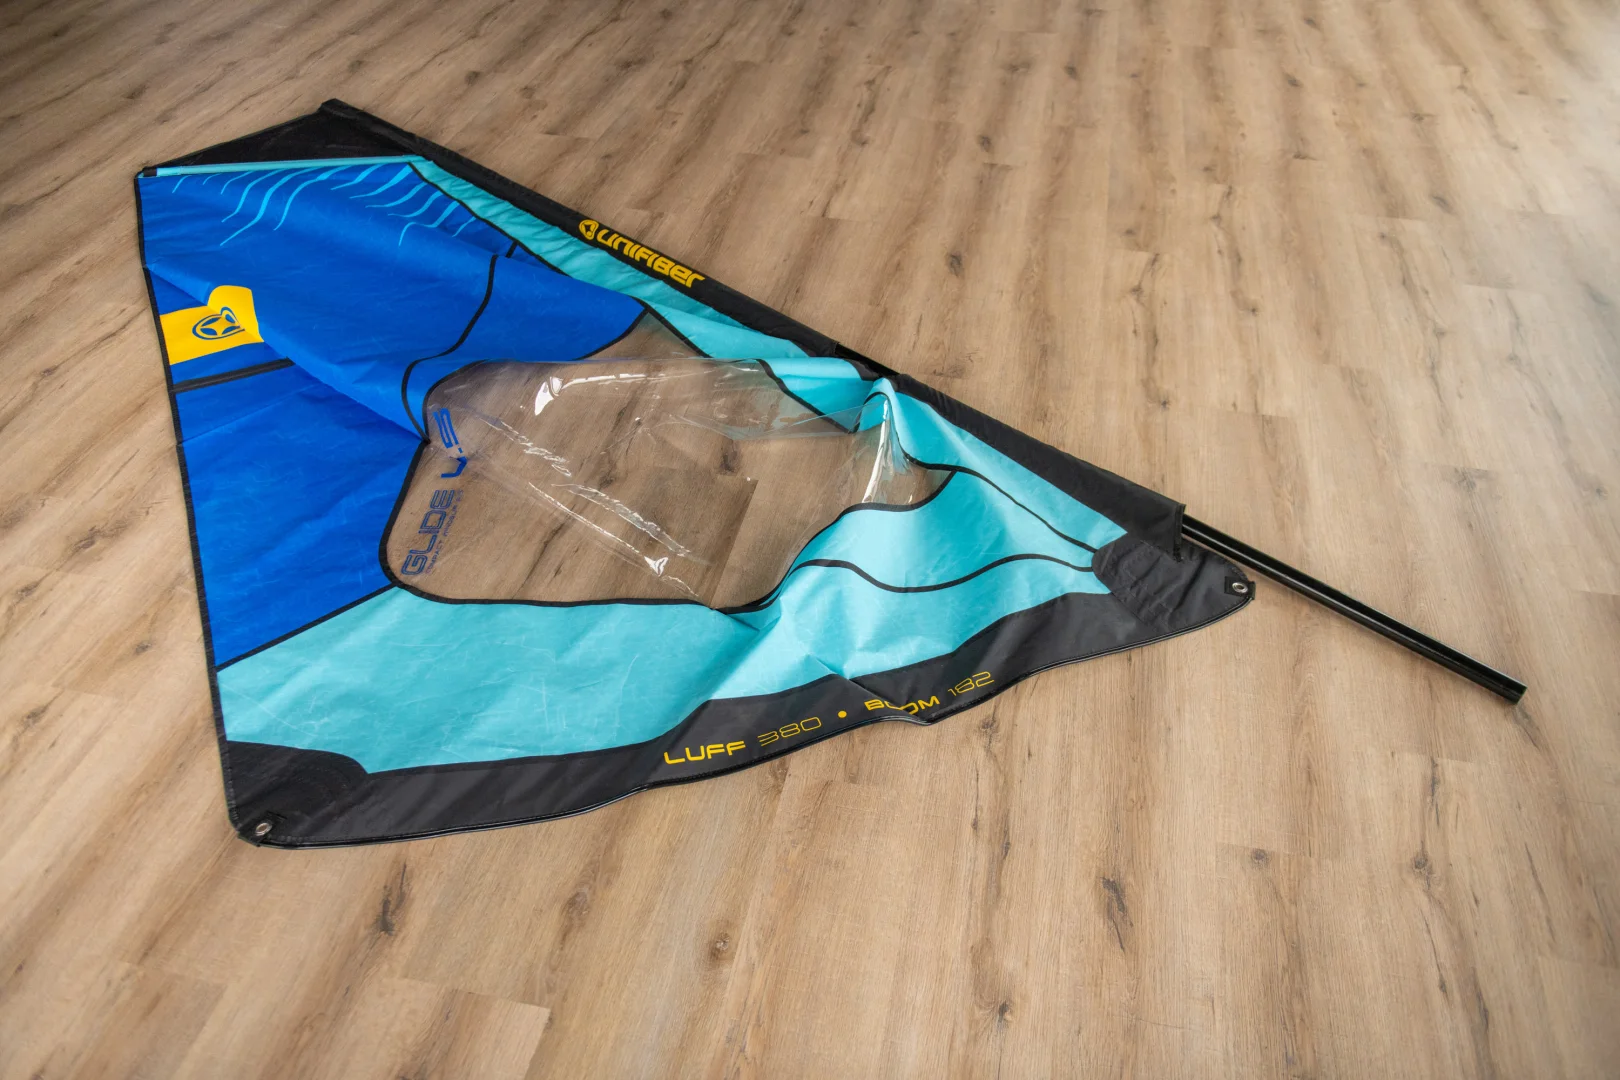
5. Important! Ensure that the mast tip is completely inserted in the head of the sail. And check by feel that the mast parts are properly slotted together at the joins.
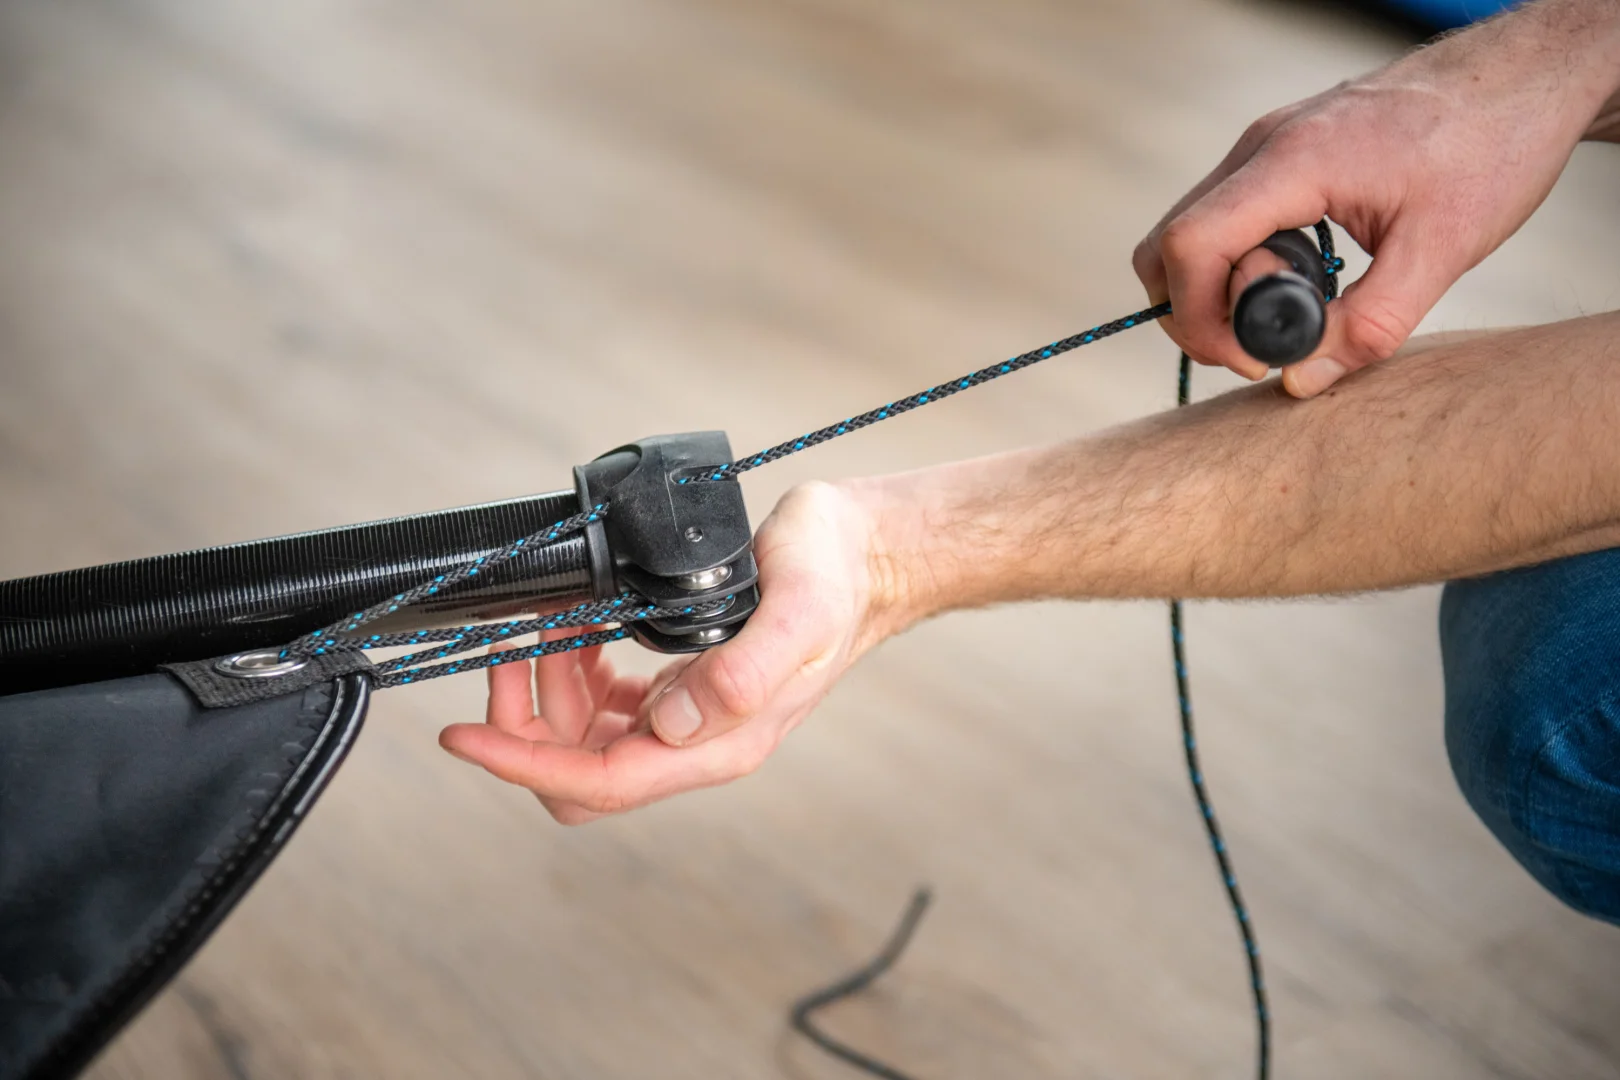
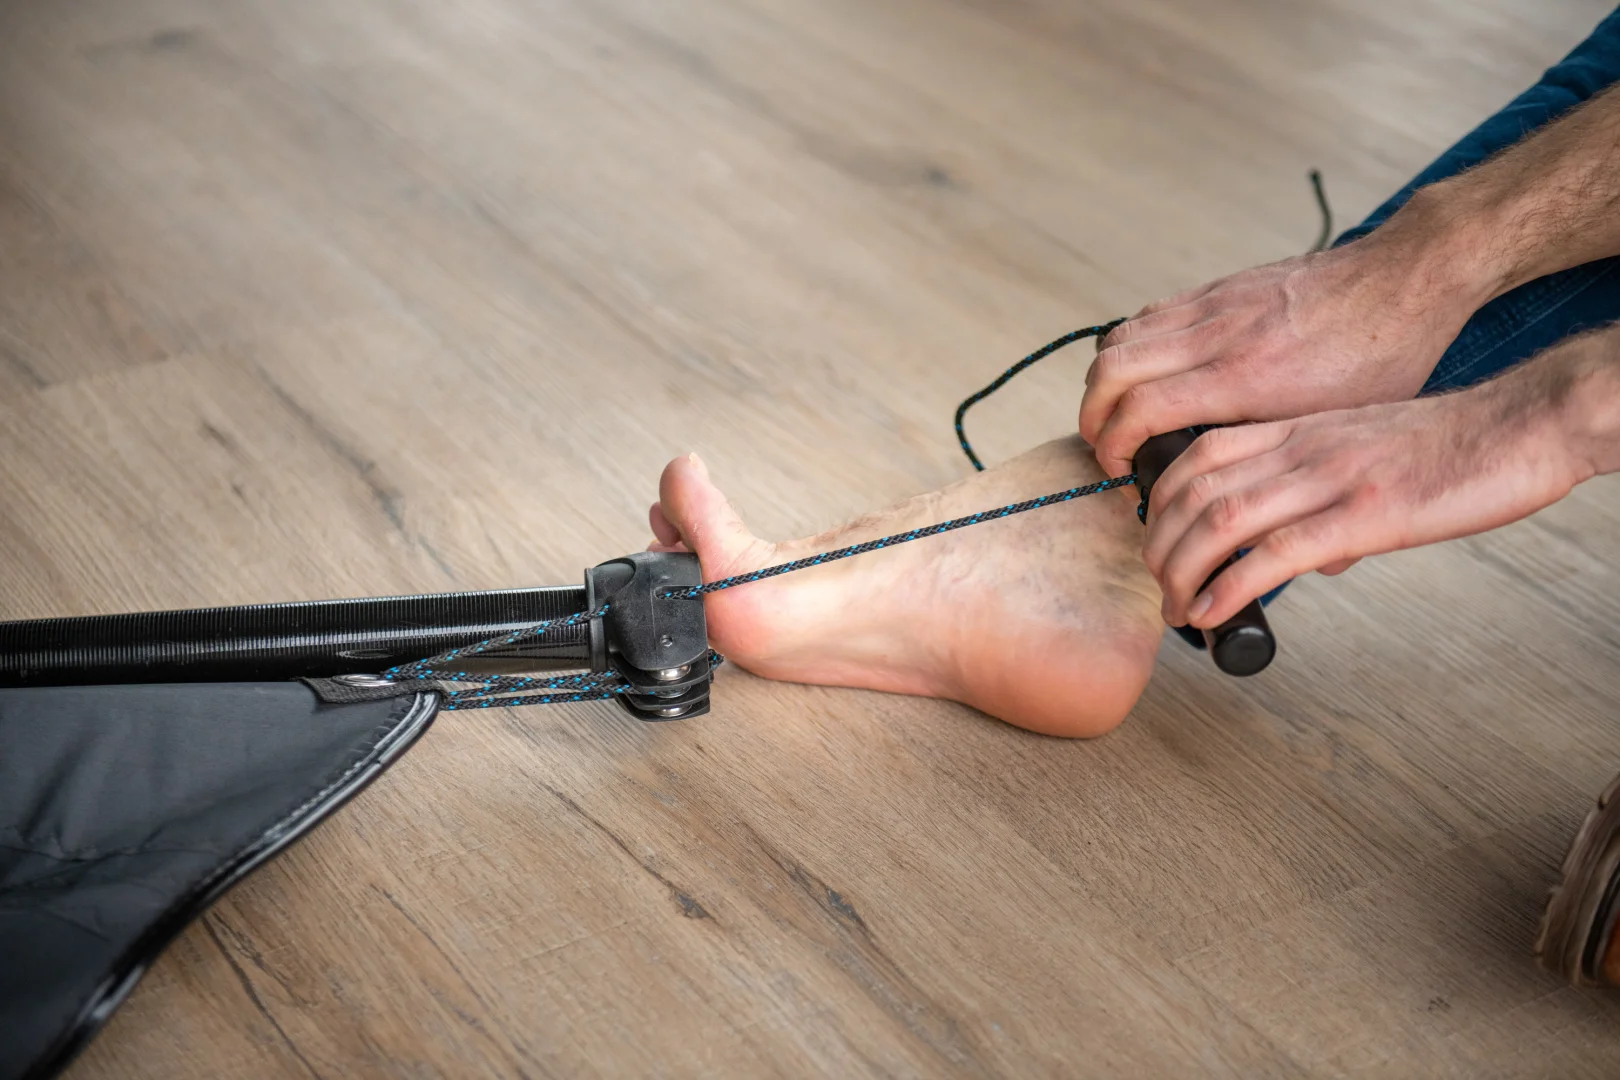
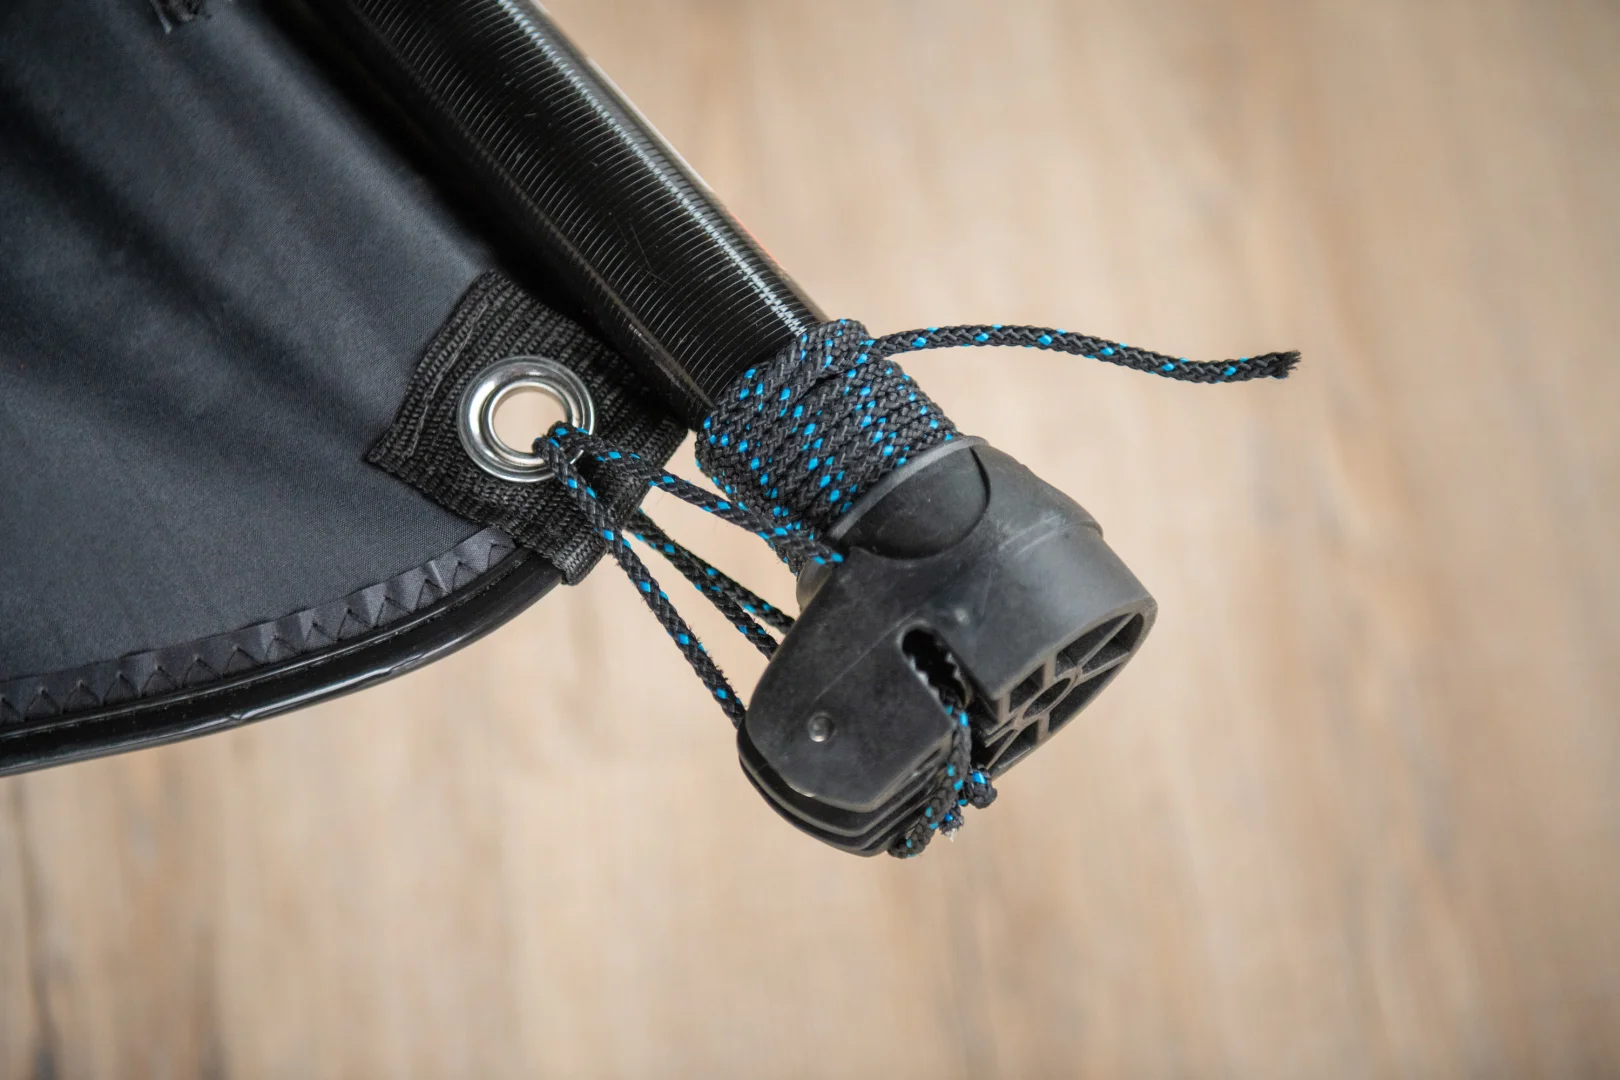
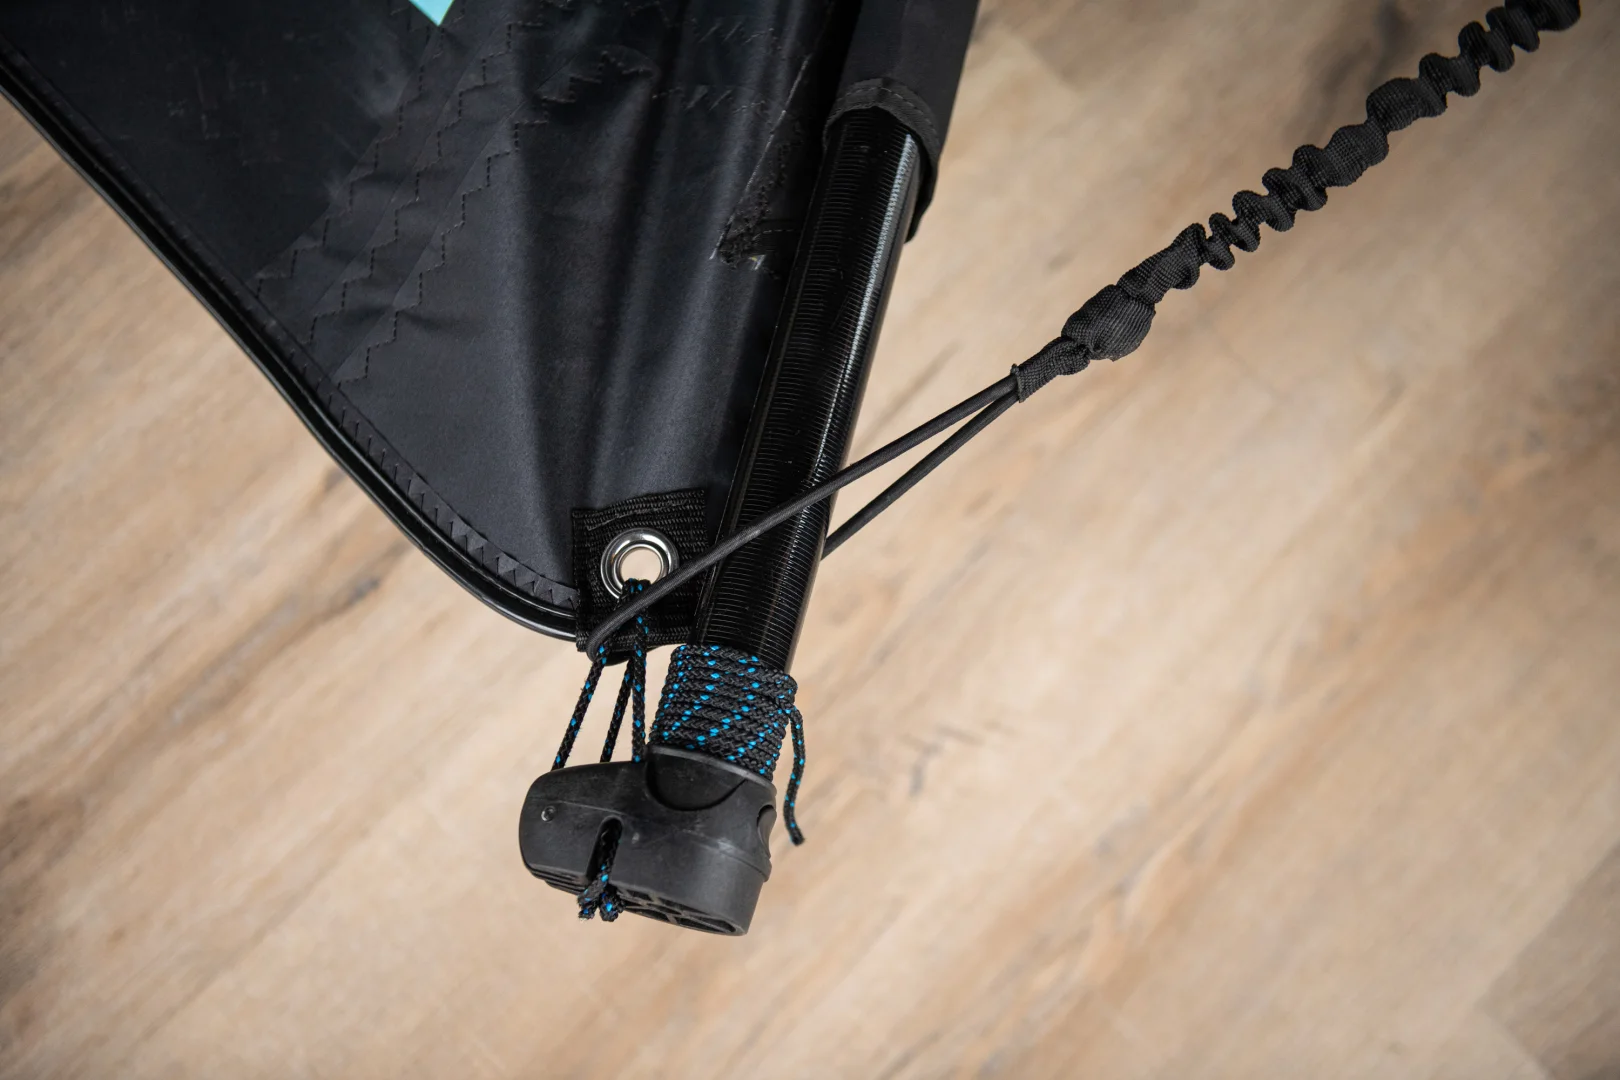
6. Put the mast cup in the mast. Thread the rope through the sail’s foot eyelet, around one pulley, one more time through the eyelet and finally through the cleat of the mast cup, as shown in the pictures:
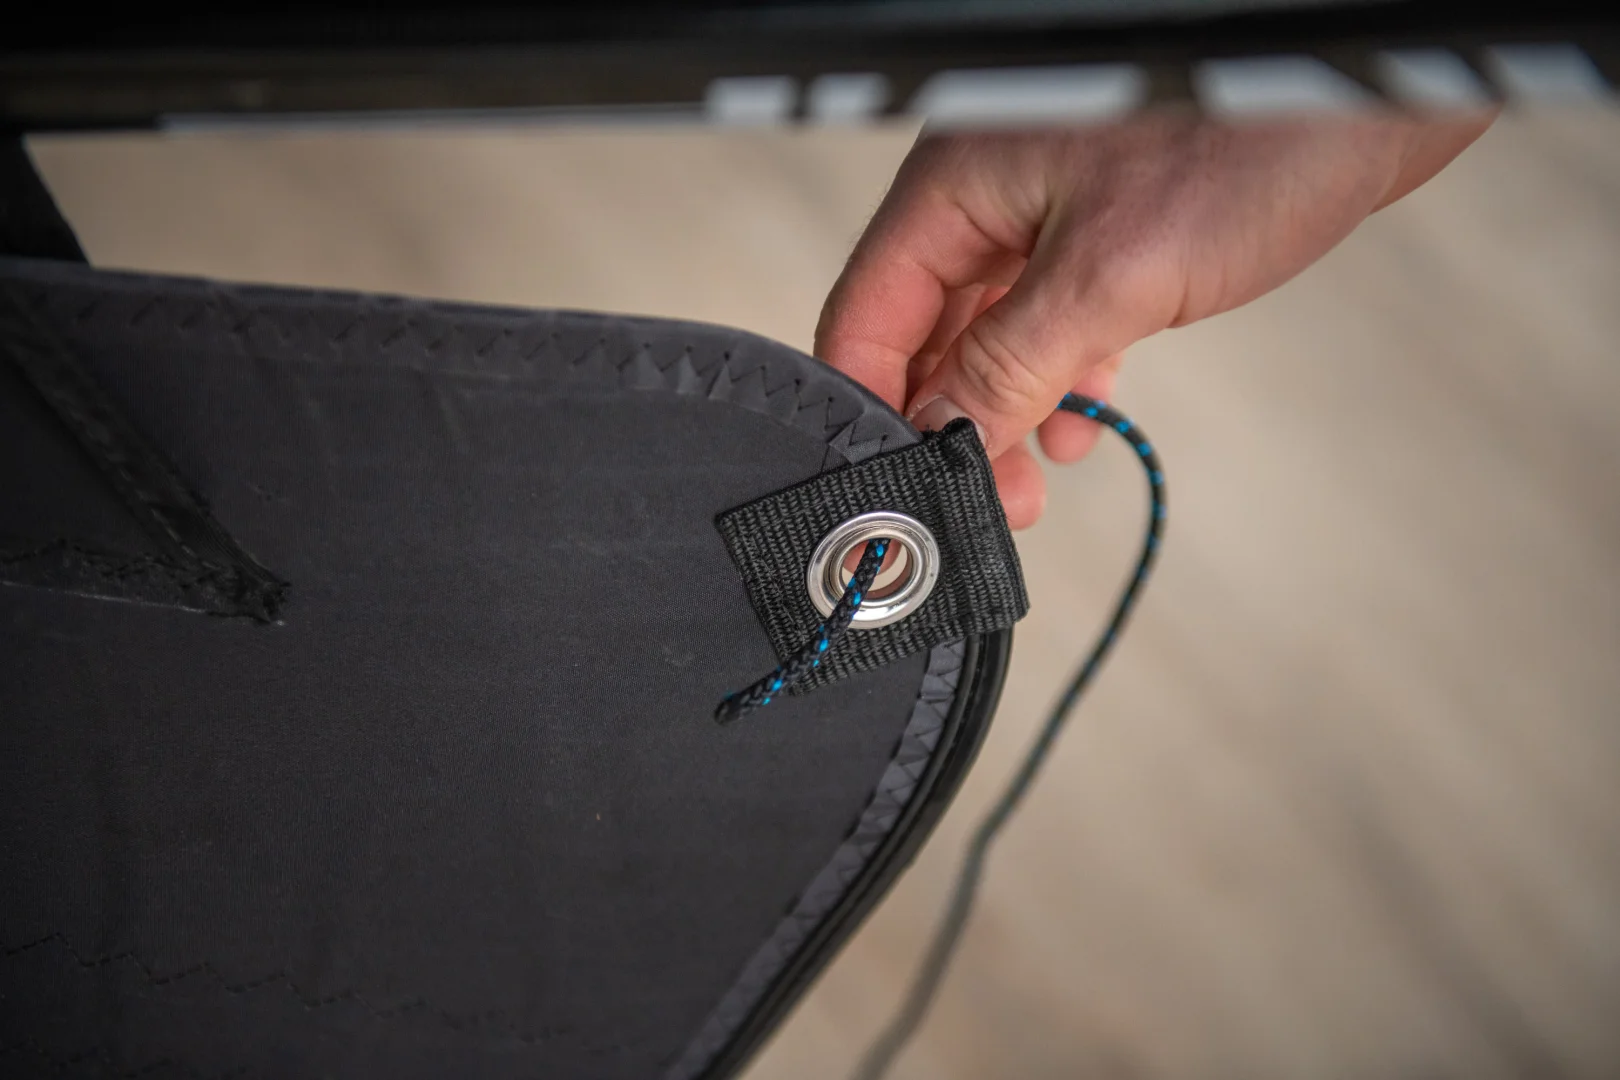
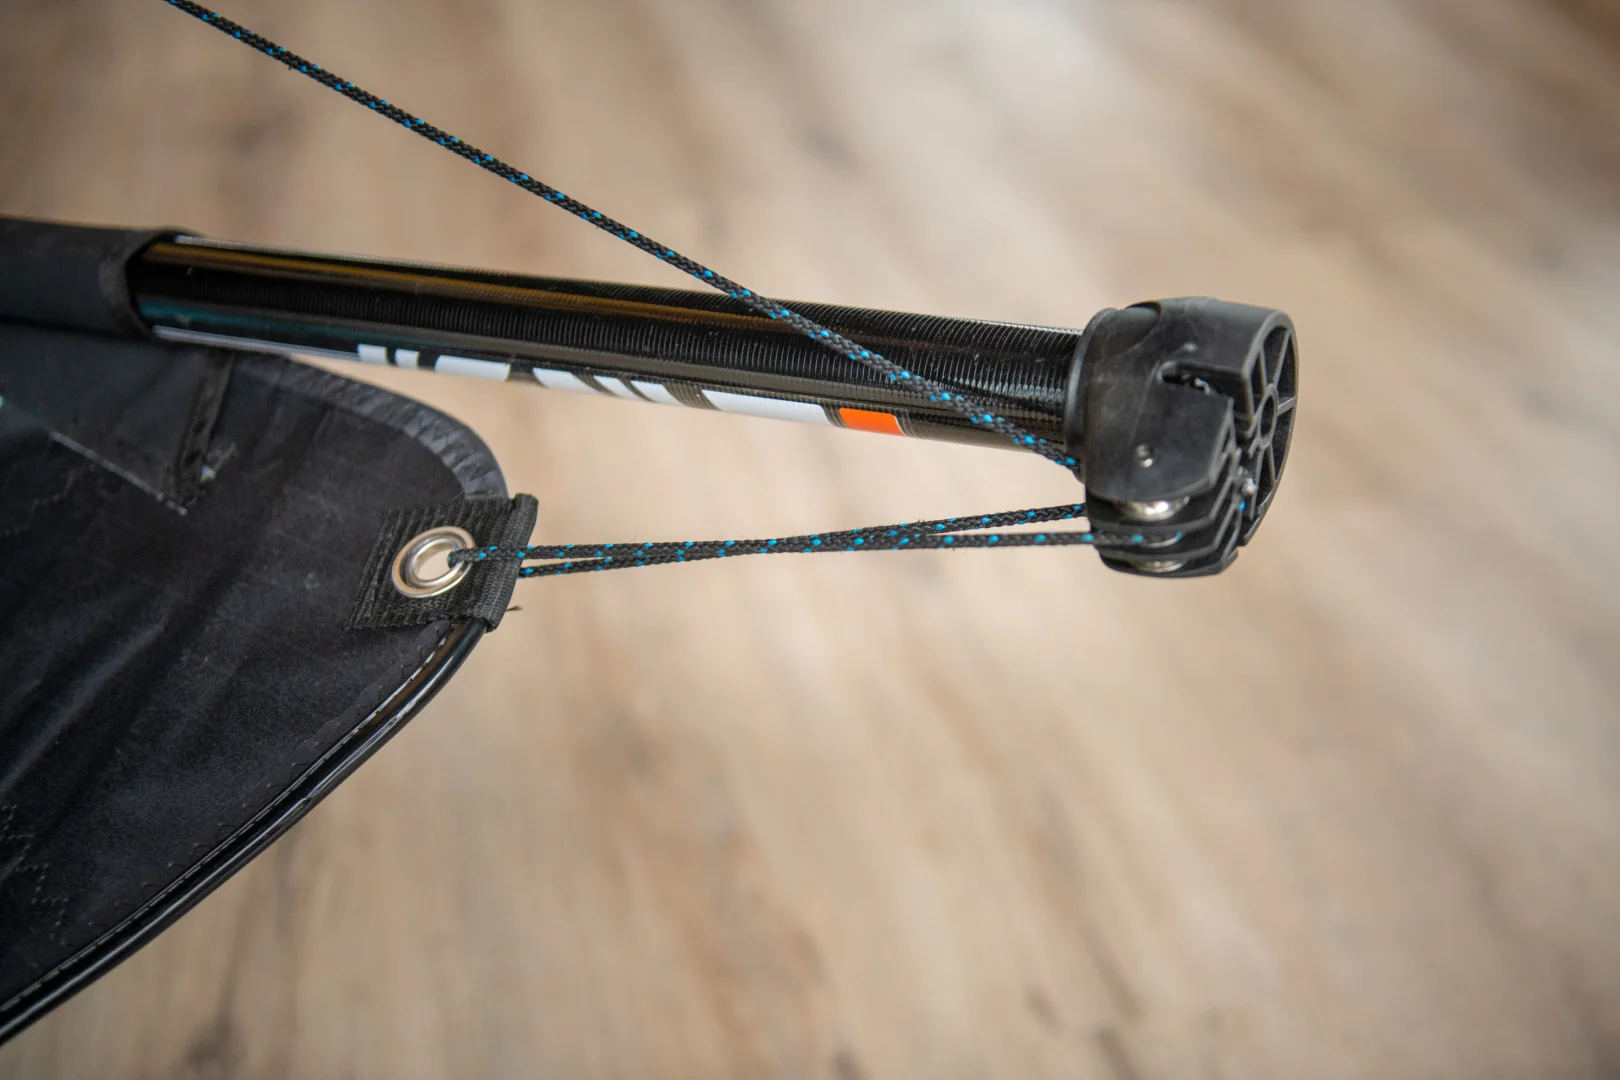
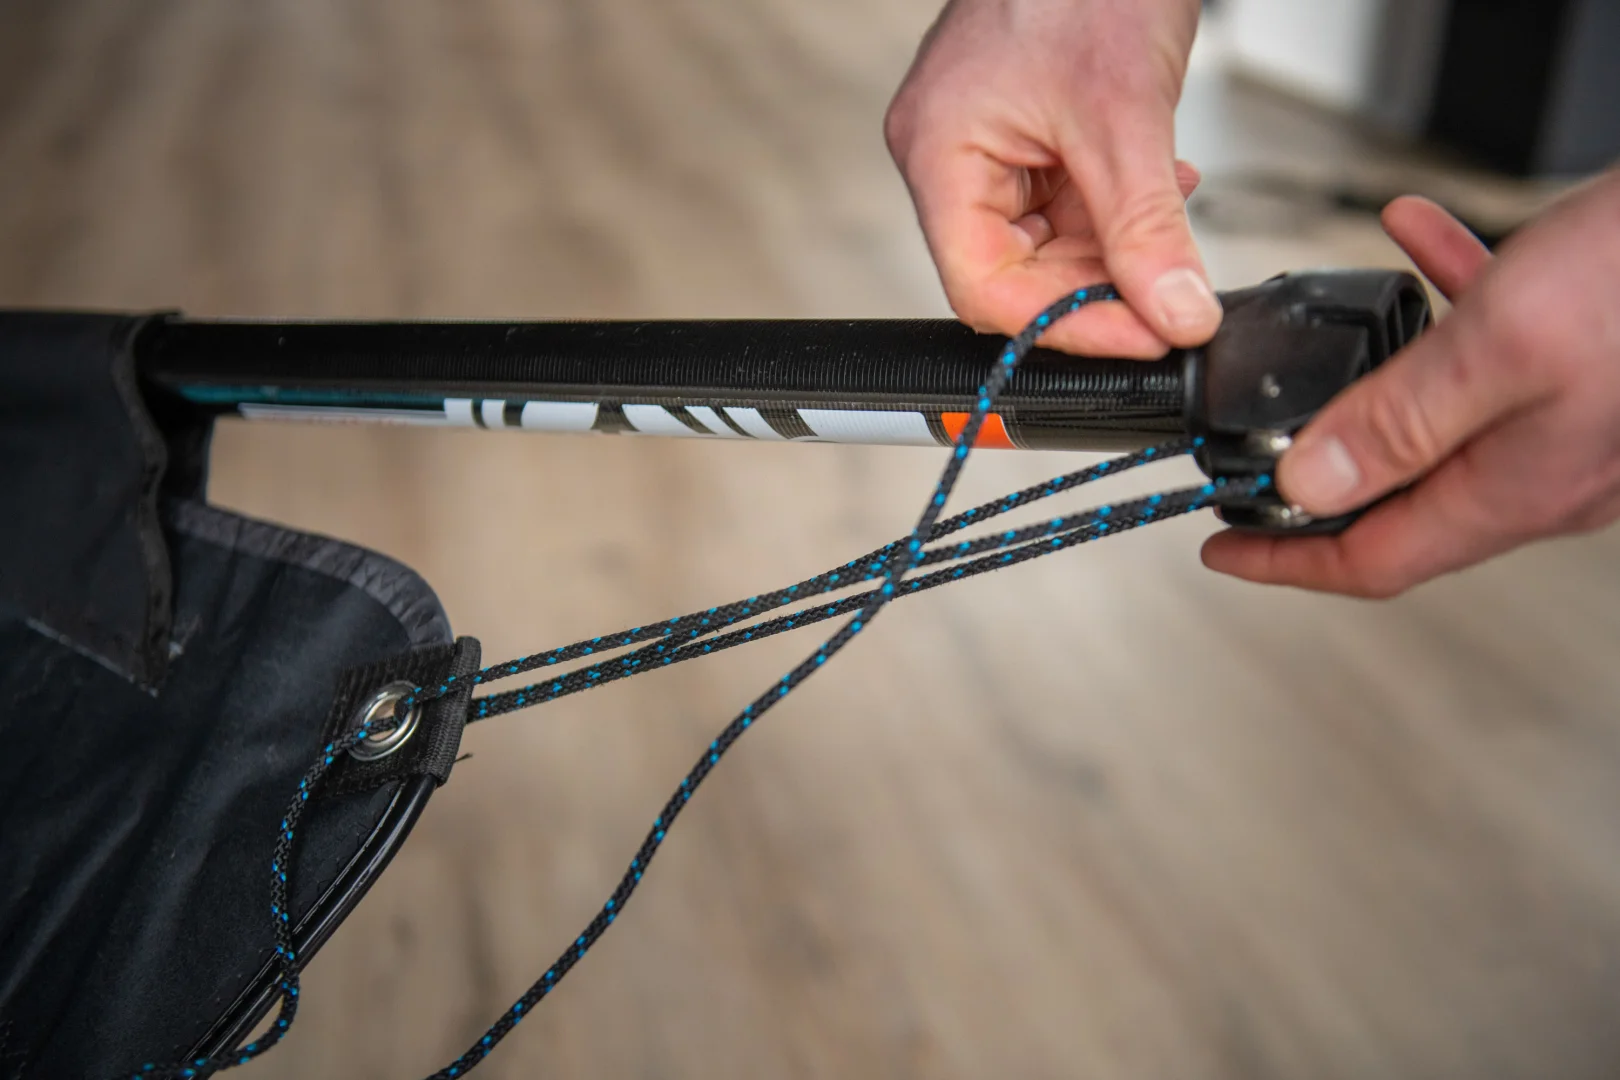
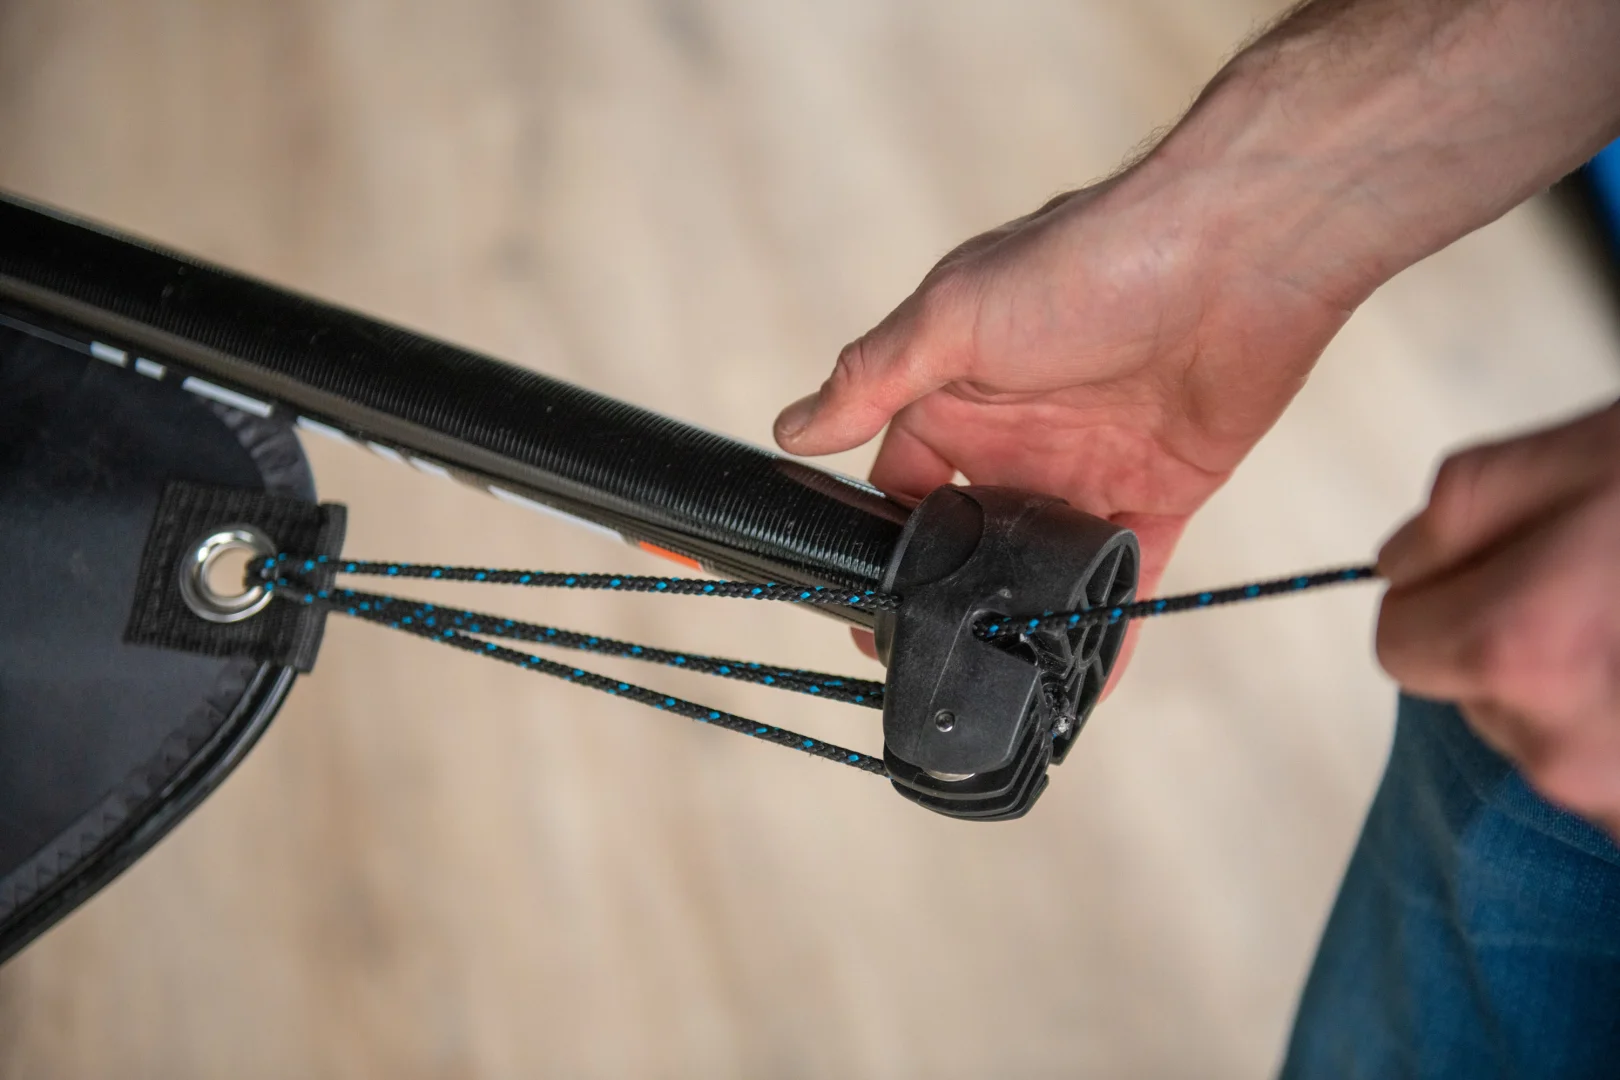
Place your foot against the base of the mast cup and pull the downhaul line to tension the sail. When there is 5 cm (2 inches) between the eyelet and the pulley, the tension is within the recommended range. The mast should bend just enough to fill the front side of the mast tube.
Tip: use the Unifiber Downhaul Tool to easily tension the downhaul rope without hurting your hands.
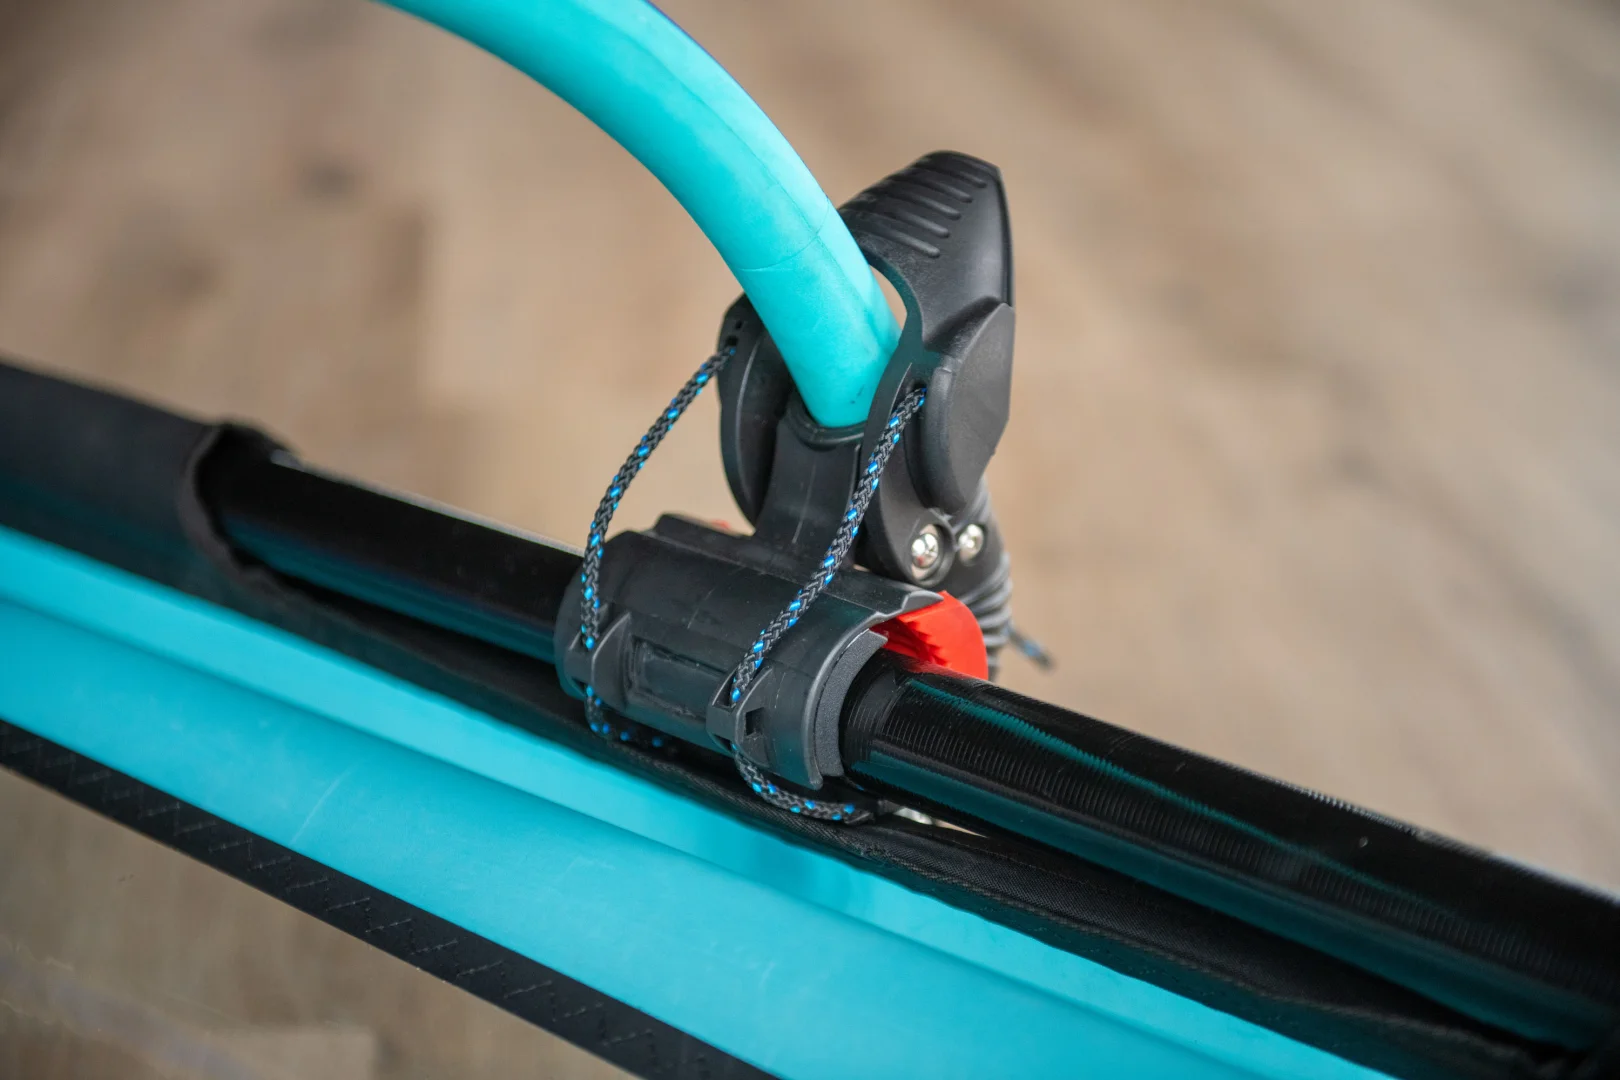
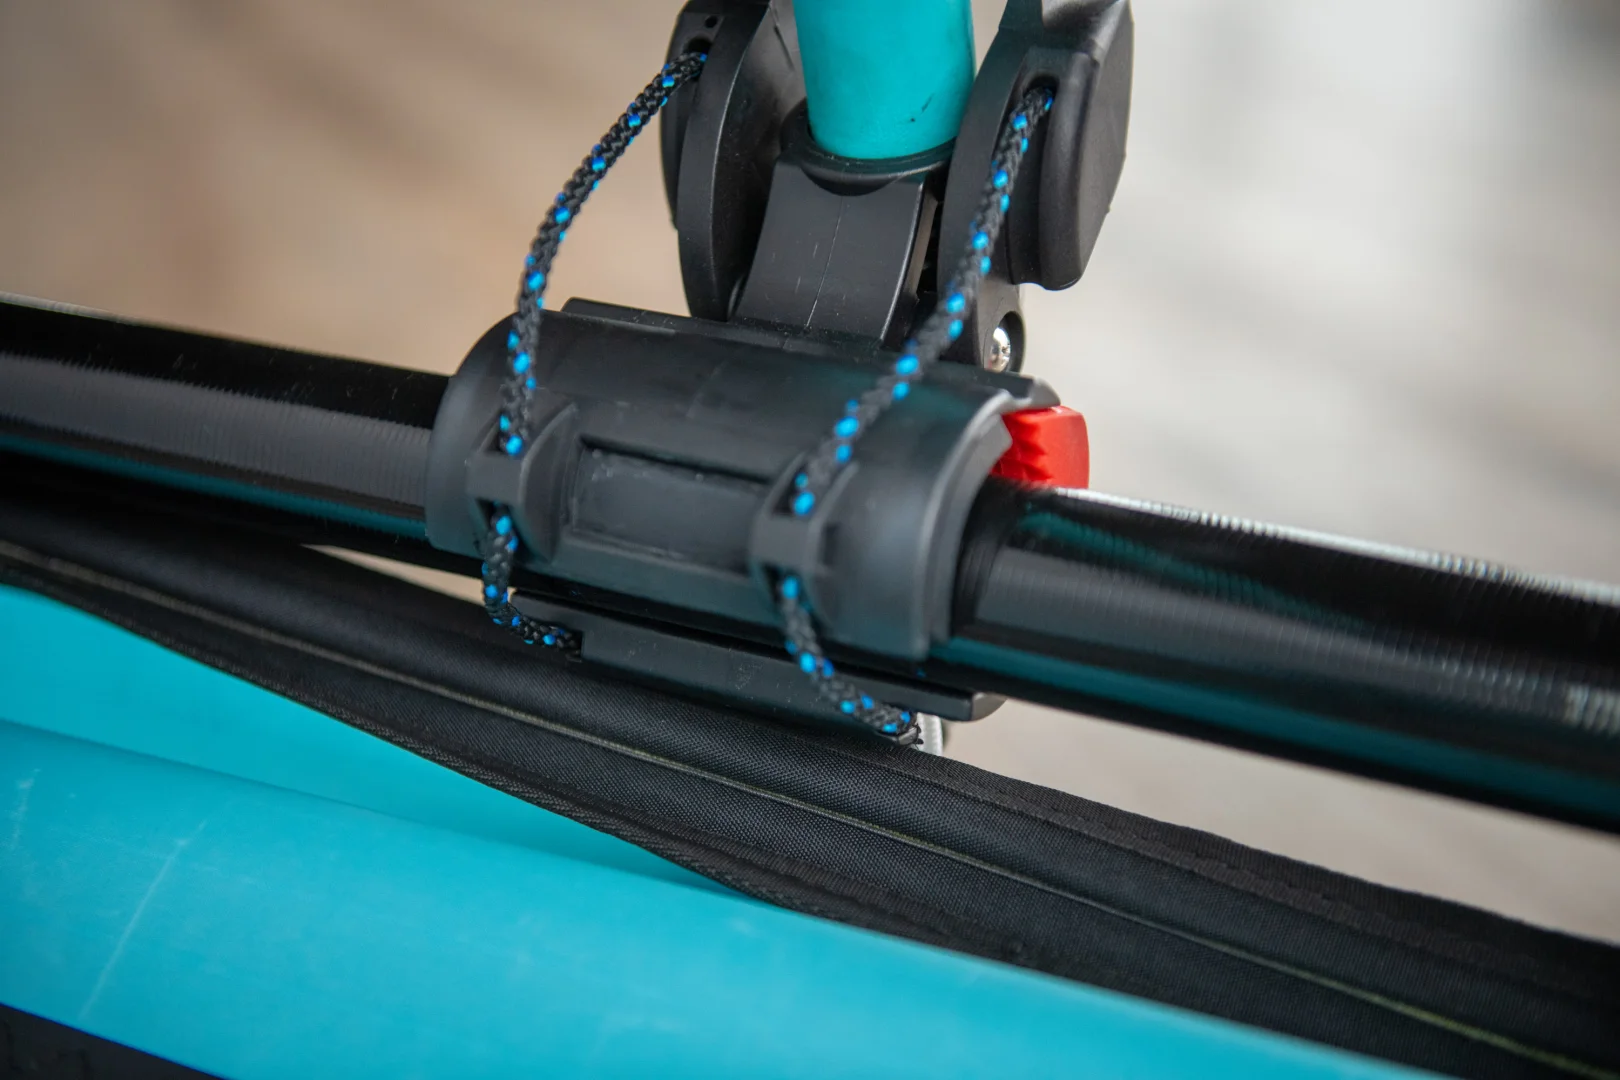
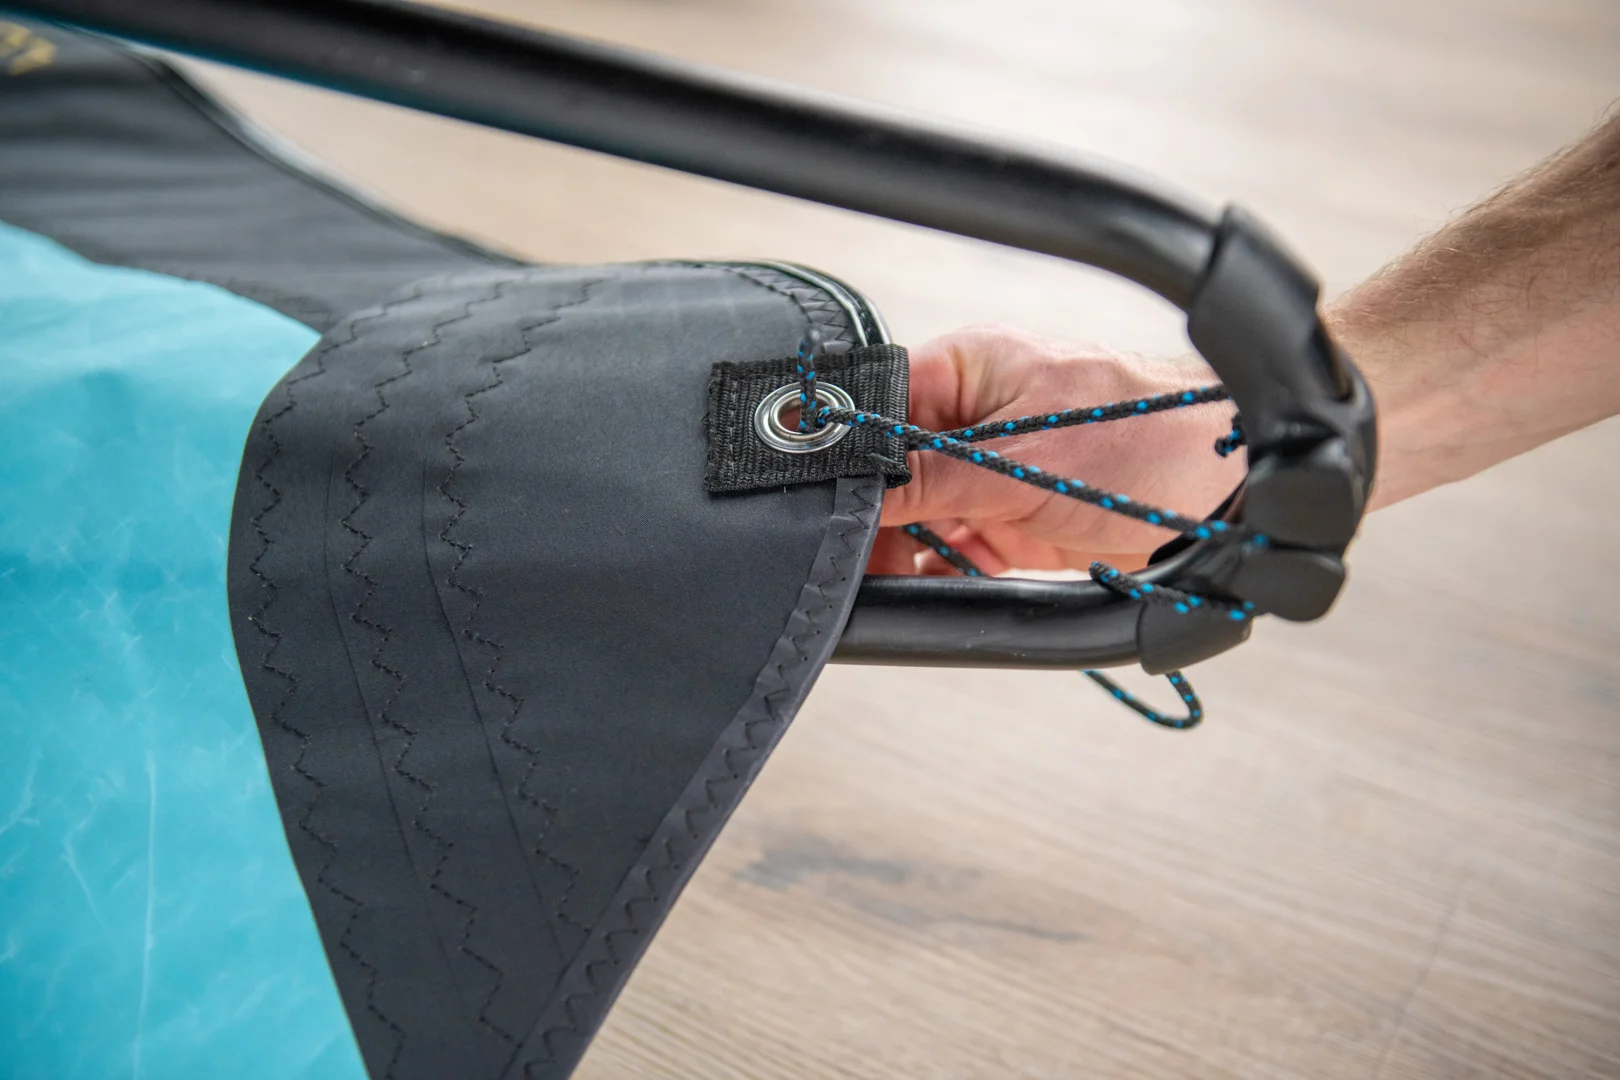
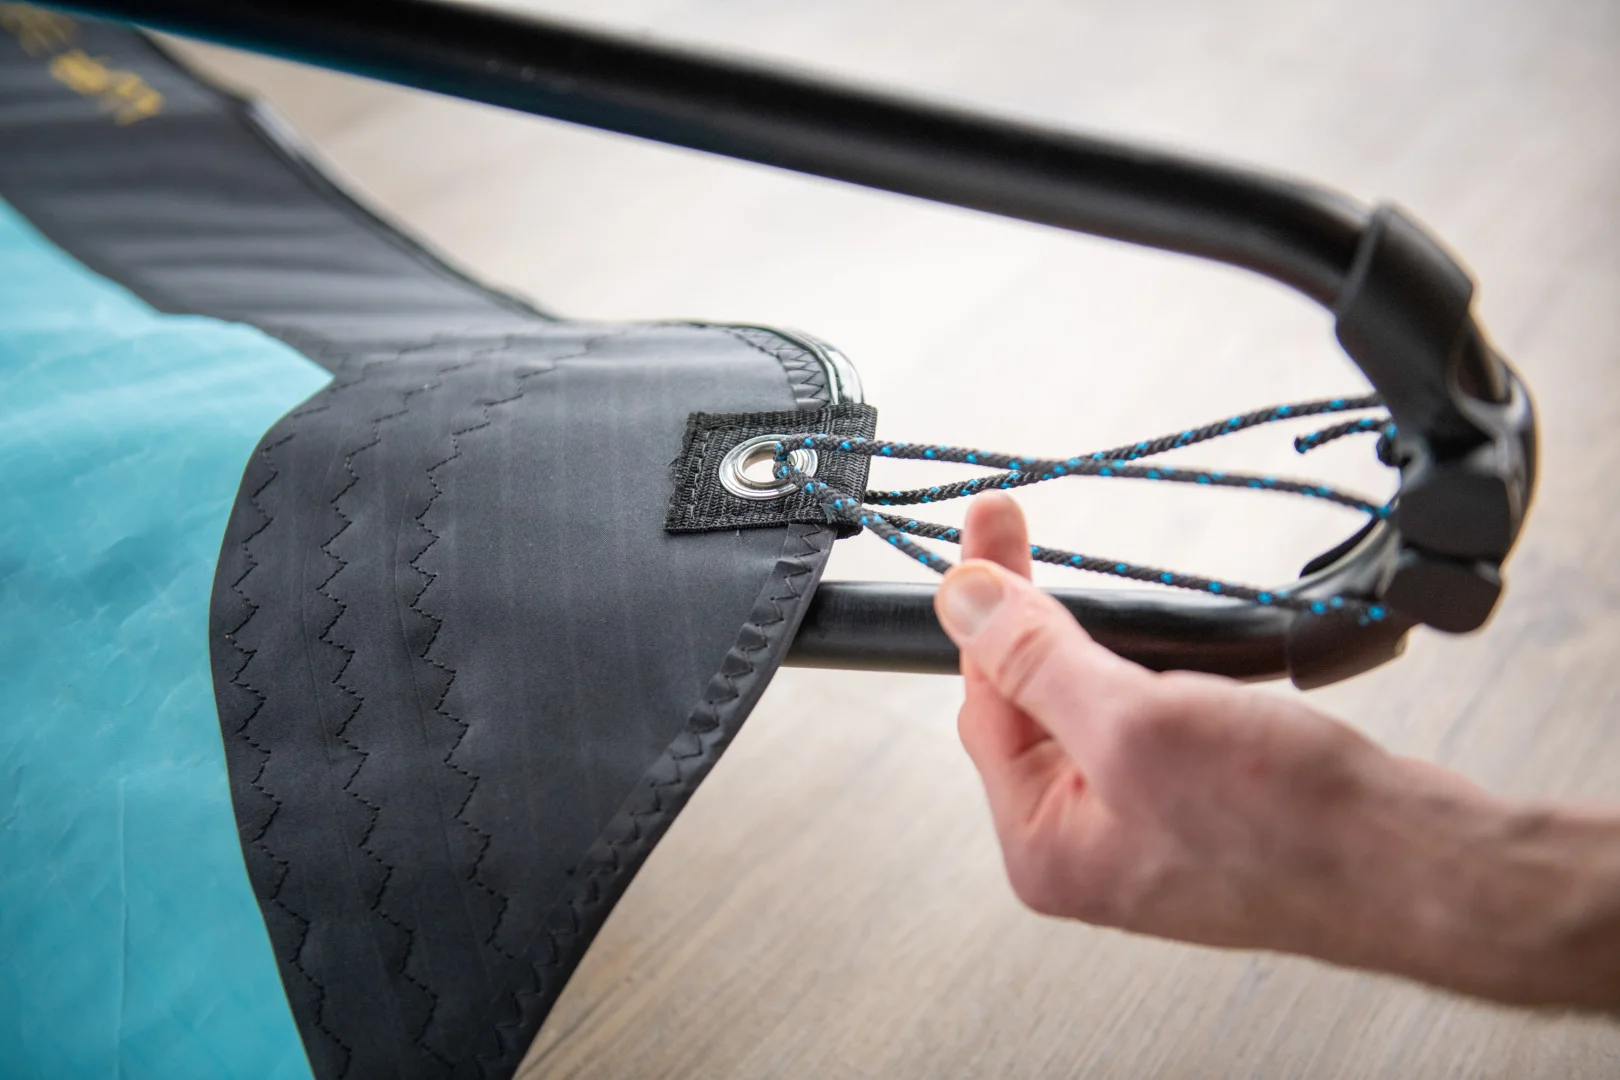
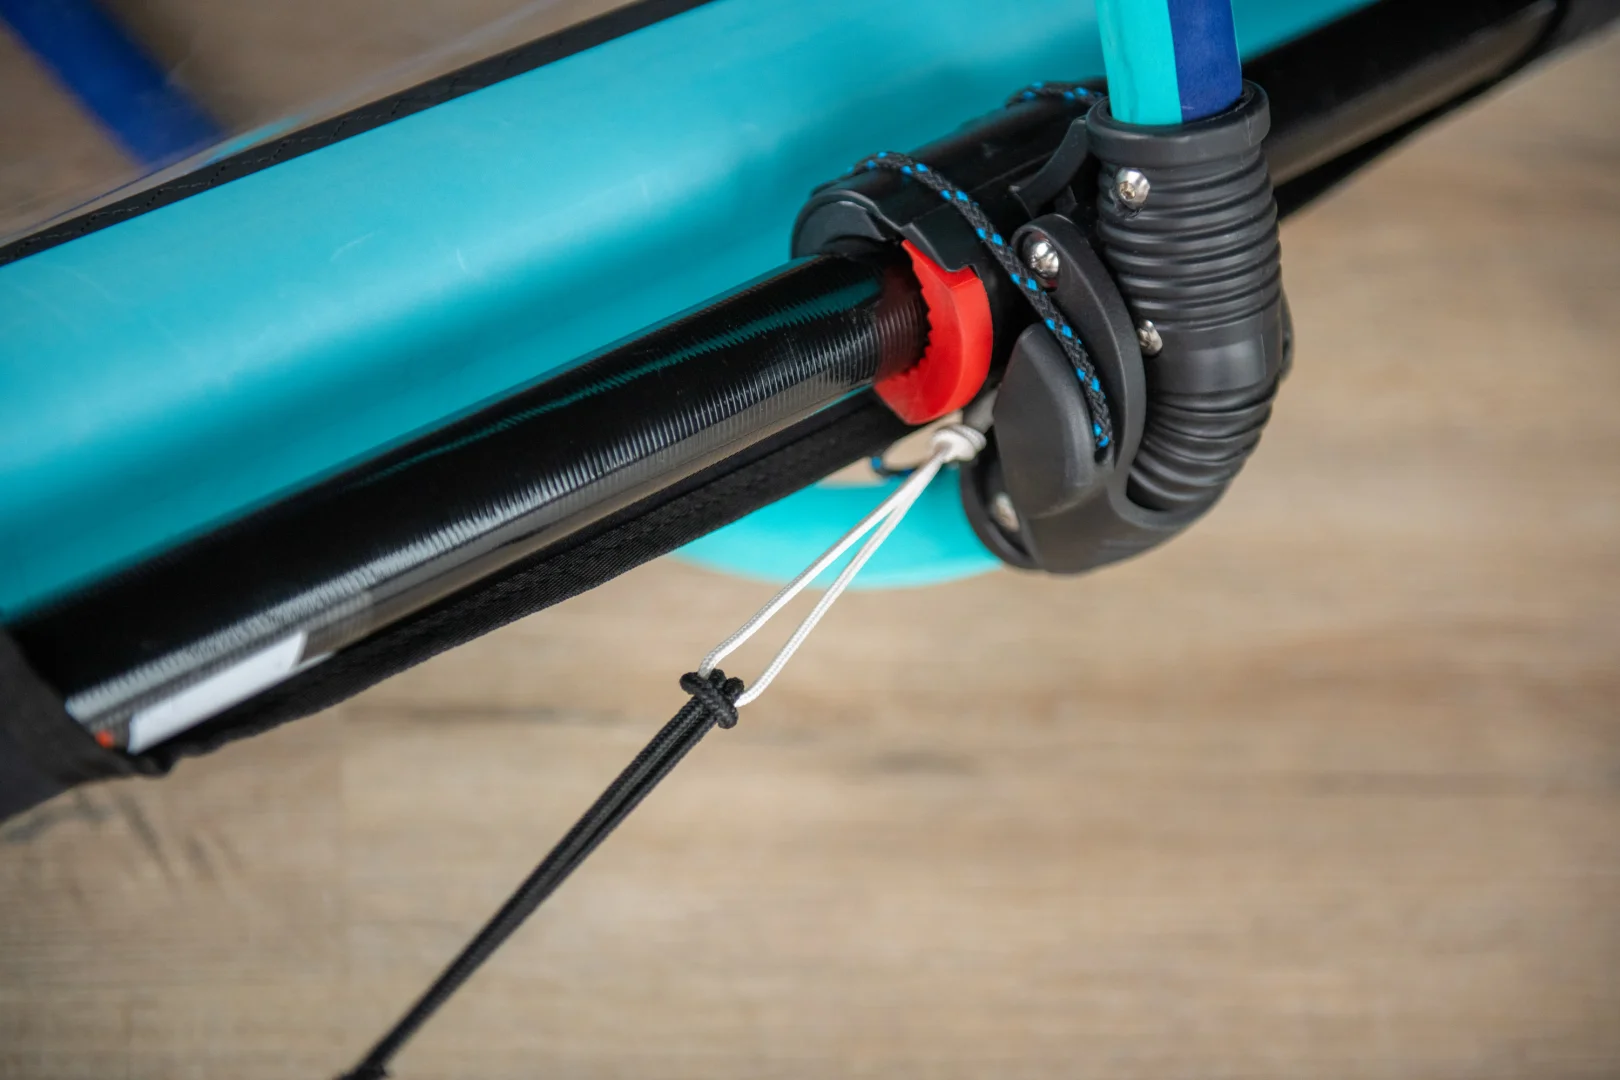
Attach the boom’s front end to the mast at about shoulder height. Make sure the clamp is firm and there is no play between the boom and the mast. If necessary, adjust the rope length to loosen or tighten the clamp.
Thread the outhaul rope through the clew eyelet of the sail. Apply light tension, as in the picture below.
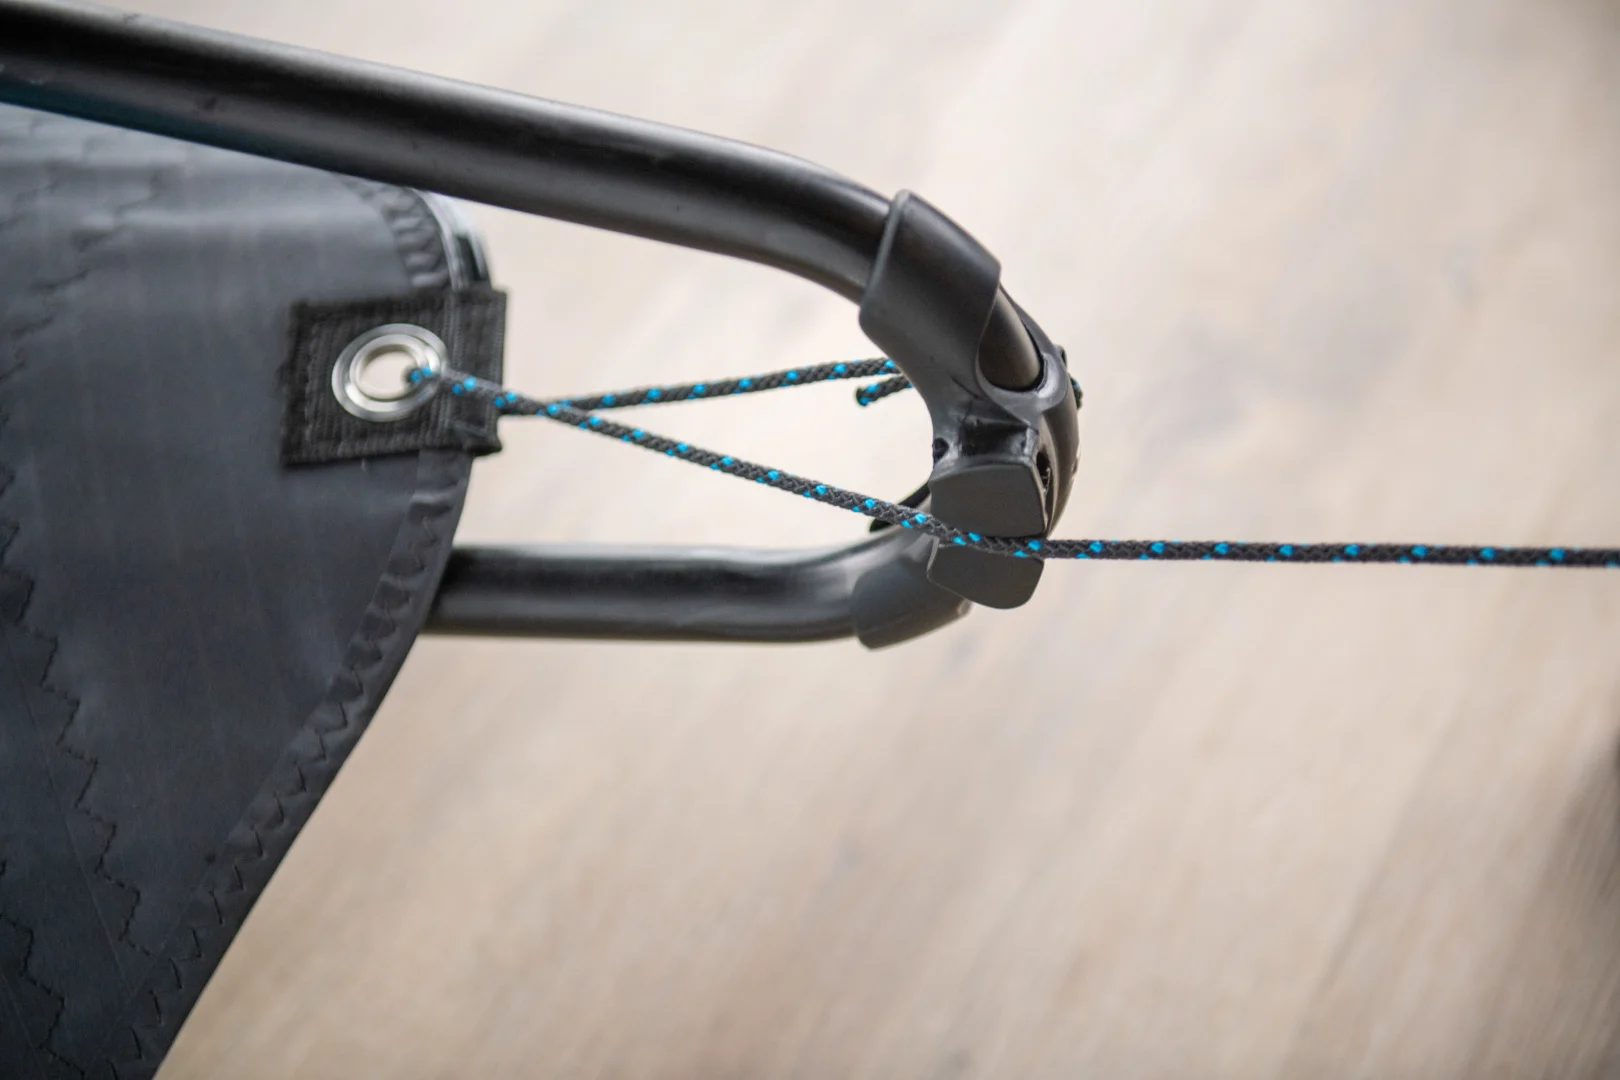
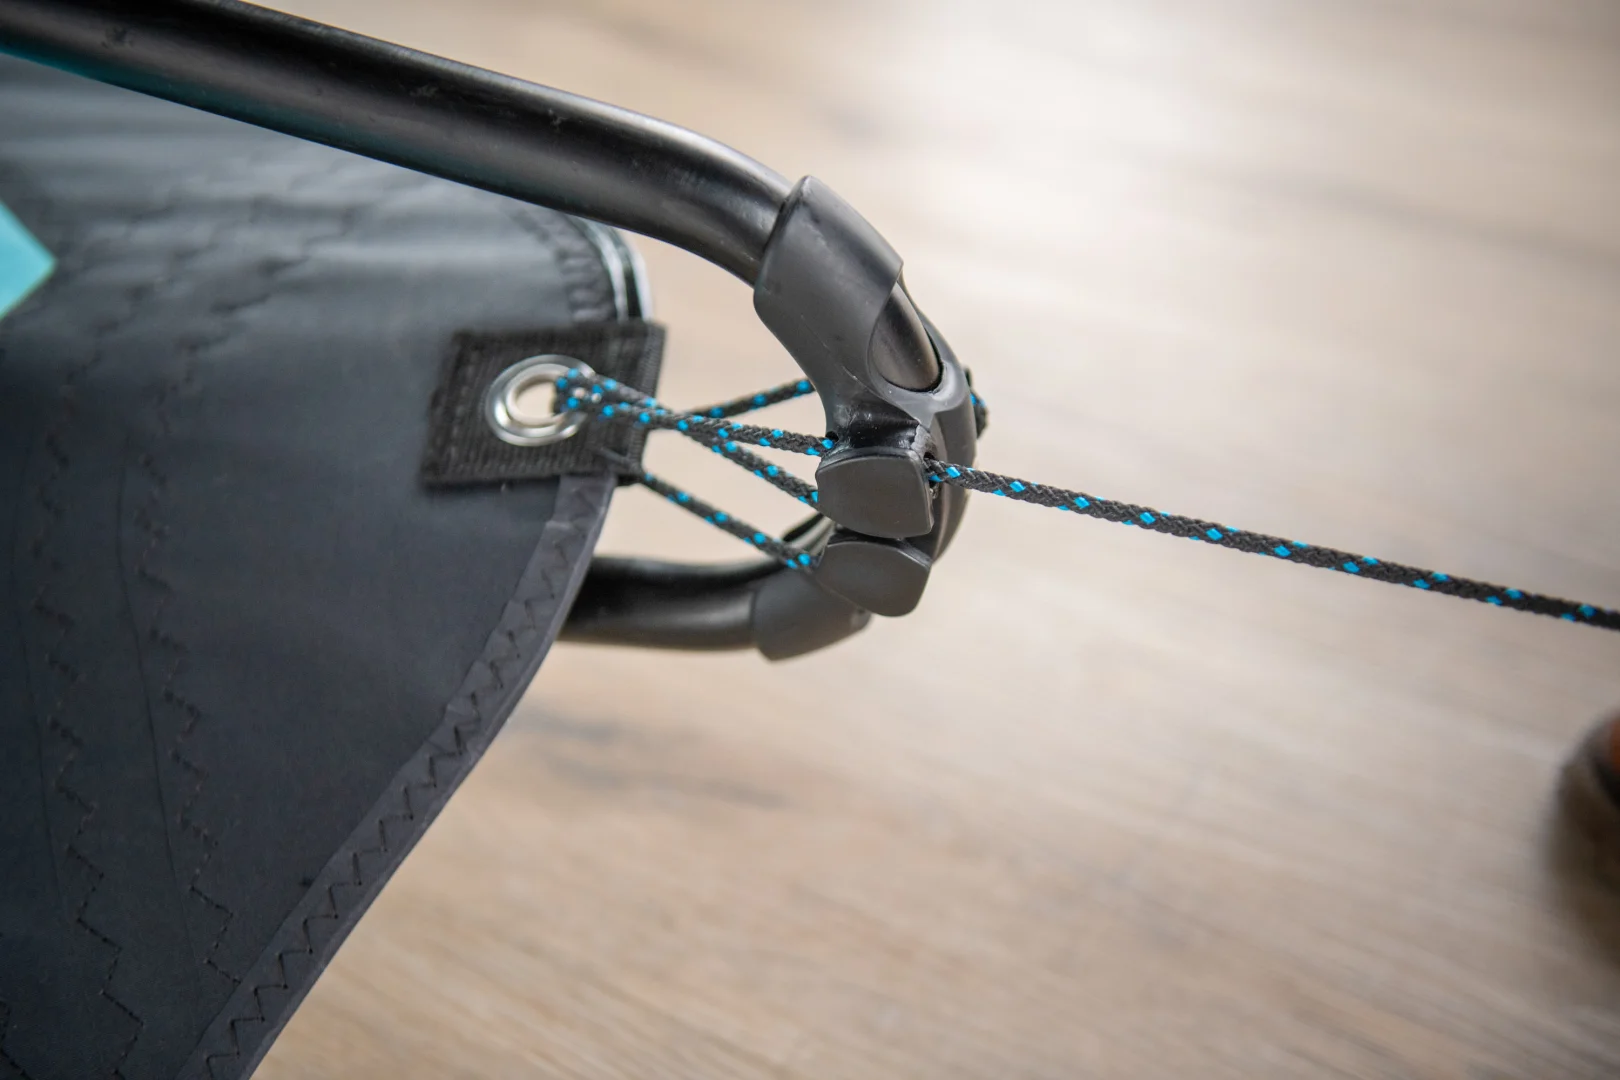
Stow the excess line by tying around the boom tube and mast base.

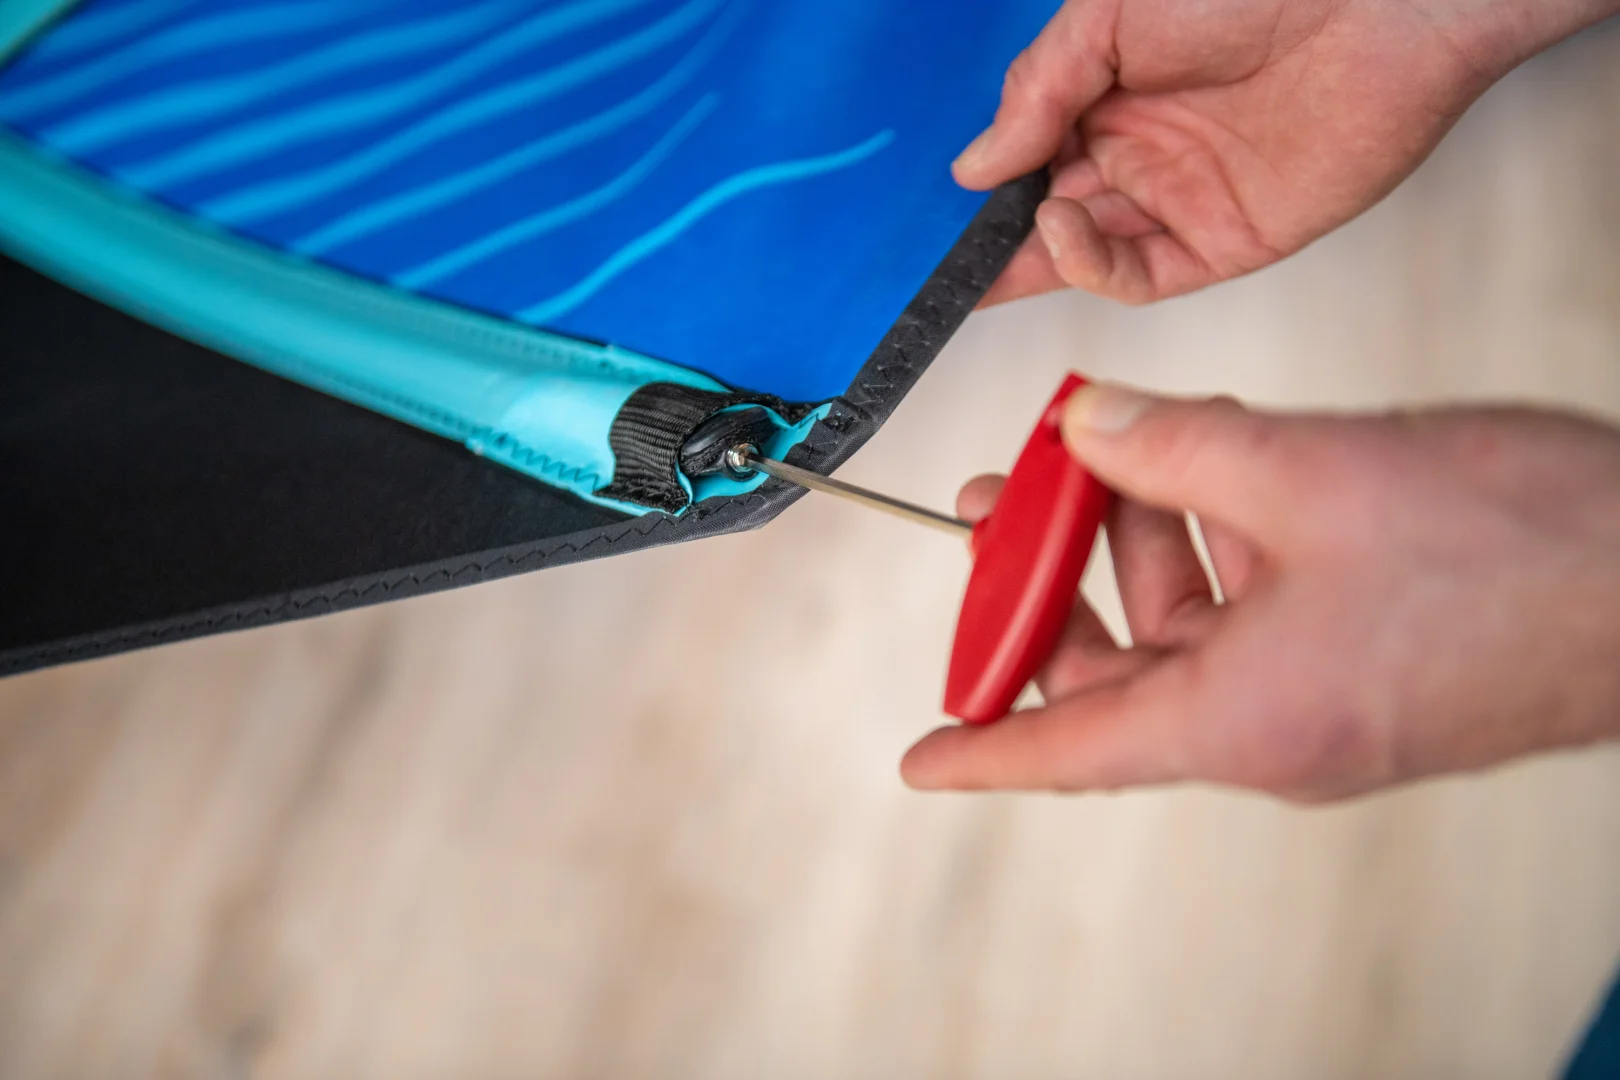
When the sail is first rigged it may be necessary to tension the sail batten. There should be light tension on the batten. If the batten is loose and can move around inside the pocket use the red key to apply more tension.
Attach the non-elastic end of the uphaul to the small rope on the front end of the boom. Loop the elasticated end around the mast base.
You’re ready to sail!
Derigging:
Follow the rigging steps in reverse order. You can leave the batten tensioned and the uphaul line attached to the boom.
Fine-tuning:
When you feel that you need more power, you can release some outhaul tension so that the sail has a deeper profile. In stronger winds, or if the sail handling feels heavy, you can increase the outhaul tension to flatten the sail. Too much outhaul tension will make the sail feel nervous and difficult to control.
Maintenance:
Always rig the sail on a gentle surface such as grass or sand. Avoid rocks and other surfaces that will scratch your gear.
When your gear is not being used keep it out of direct sunlight. Over-exposure to direct sunlight will shorten the life of the sail.
When your sail is damaged by a puncture wound or small tear, fix it immediately. Take it to a professional repair shop; or - for a temporary fix - use Dacron tape or clear monofilm tape as appropriate. Even duct tape is an option if nothing else is available. If you continue to use a sail that is damaged, the tear may spread and become much more difficult to repair.
We recommend letting the sail dry before putting it in its bag. Store the sail in a well-ventilated place.